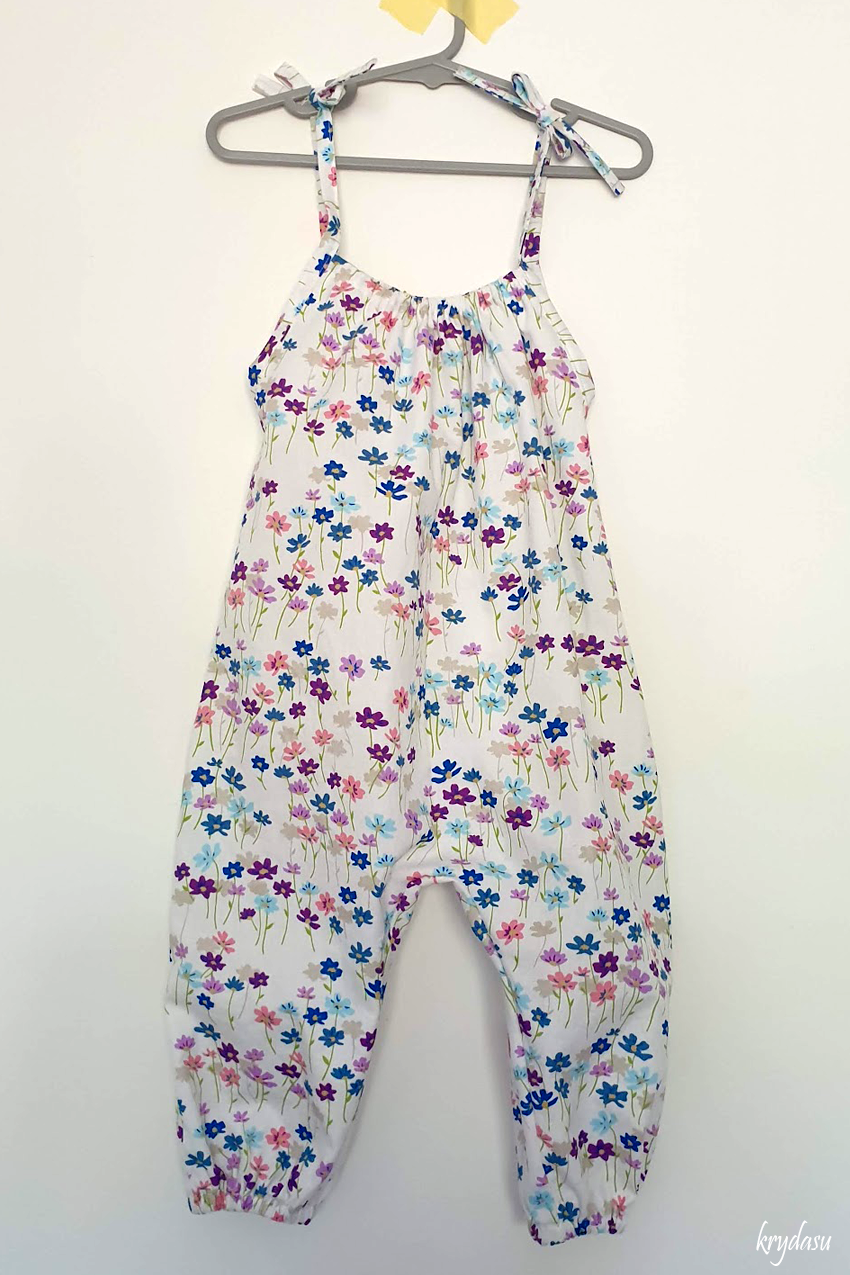
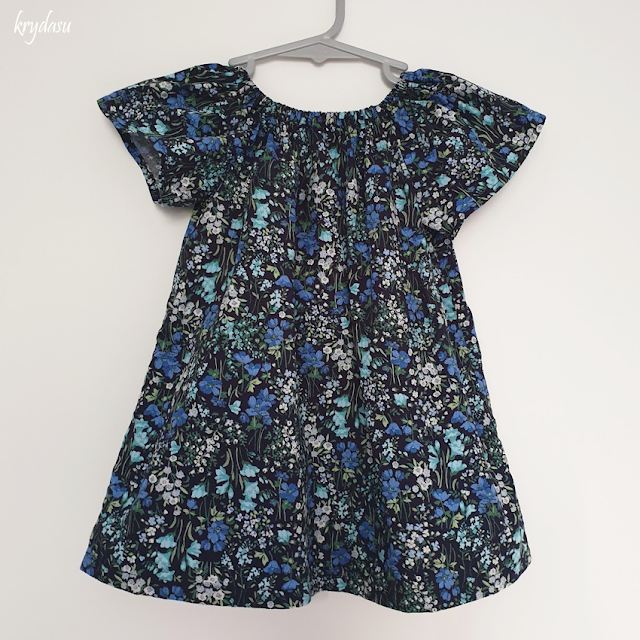
Showing posts with label tutorial I followed. Show all posts

Thursday, 8 February 2024

Garden apron

 I made myself a garden apron! Because half my clothes don't have pockets which is really annoying when you're on acreage.

Of course I'm happy to finally finish my new apron, but nowhere near as excited as Lily is! I tried it on to show her and she was stuffing all her pens in the pocket - I assume it'll be full of 'pretty' rocks whenever we go outside.

This is the tutorial I followed, with a couple of changes. First, I cut the pocket front and lining the same size so I could keep as much of the print visible so I don't have the decorative trim at the top. Second I didn't have any D rings so I cut the tie piece 9" longer - I can just tie it in a bow, so definitely needed to add a few more inches.

And then I went and made an apron for Lily using the same fabric...

I used this tutorial, but when it came to sewing I found it easier to follow their video. I didn't add a pocket into the bib as I turned the skirt into one huge pocket! It is simply a second skirt layer with some hand holes cut out of each side, I finished the pocket edge with bias binding since it was a curve.

Tuesday, 2 August 2022

Sunflower Skirt and Scrunchies

 Since I've finally gifted this skirt I can share it with you, not that it matters since my niece doesn't know I have a blog!


 I love this sunflower fabric from Frankie Bear Fabric. I made my daughter a dress out of this fabric, unfortunately it was too small and I didn't take a photo of it before packing it away. I even bought adorable flower buttons to match, luckily I bought extra fabric so I can sew her another dress. Although it was meant to be so I could sew myself something...

It's the same pattern from Scattered Thoughts of a Crafty Mom which I used for the galaxy skirts. The fabric is 145cm (57") wide so I just used that for the width, the total width needed for size 16 was 55", so I only needed to do the one seam. I kept the extra 2" as I used button hole elastic again so my niece can wear it now, tightening the elastic will just mean extra gathers and it can be loosened through a couple of growth spurts!

The matching scrunchies are a tutorial from See Kate Sew. My elastic has a lot of stretch to it so I cut them an inch shorter, but I probably should have used even less - or just buy some better quality elastic!

Tuesday, 5 July 2022

Boho romper & booties

 For some reason I decided that it would be a great idea to make our daughter a romper with matching booties. Each piece is great on their own, but unfortunately it's just too much together! I think I'll make a pair of solid white booties next time.


I used a lovely Victoria woven cotton from Frankie Bear Fabric. The pattern is Maggie's Stay on Booties again with the non slip fabric for the soles.


This is the second time I've made the Boho Romper from Elemeno. First time I made it was when our daughter was just 3 months old, and she quickly outgrew it! Now that she is older I thought she would love the optional pockets. The only thing that I would change is to figure out how to add snaps for quicker nappy changes.

Tuesday, 14 June 2022

Galaxy booties & bonnet

 I love this galaxy fabric from Frankie Bear Fabric, she's almost outgrown her romper so I'll have to make her a new galaxy outfit.


These are Maggie's Stay on Booties, I bought the whole set so eventually I'll make some for myself! I made a few pairs with cotton lining instead of fleece since it doesn't get cold here in Autumn, now that we're in winter I put socks on with them, eventually I'll make the next size up with fleece lining.

I will say I put off sewing these for awhile as it just seemed like it would be difficult but they're actually easy to sew, and quite quick! 

I used non slip fabric for the soles since my daughter has started walking.


I made her a matching bonnet using the free winter bonnet pattern, also with cotton lining. Now that it's winter I'll make her a fleece lined one.

Tuesday, 3 May 2022

Winter Bonnet

 It doesn't get too cold in winter here so the only time we might need our hoods is when we're outside. Our baby needed a warm winter hat for her first winter last year and I wanted one that covered her ears. I found this free winter bonnet pattern from Purl Soho.


I used poplin for the outer and fleece for the inside. I also decided to topstitch all the way around just so it sat nicely. 

We're heading into winter soon so I've started on a bigger one. Since she runs hot I'm using cotton for both the outer and the lining, if it actually gets cold this year I'll make her another one with a fleece lining.

Tuesday, 5 April 2022

Galaxy Matching Outfits

 Christmas 2021 I made all the nieces, nephews and sibling in laws matching clothes using this galaxy fabric. I love this fabric, it works for both male and female, and I have enough leftover to make myself something one day!


For my daughter and her little cousin I made matching Overall Playsuits from OhMeOhMy. I shortened the straps and the front top by one inch since it's already too long for my tall baby. If you want to see what changes I make when sewing this pattern you can read my other post here.

For my little nephews, I used the Sycamore shorts pattern from Sew Like my Mom. I was lazy and didn't add the pockets, but I did a size bigger and added buttonhole elastic to the back so it will fit them longer.

For my nieces, I used the elastic waist skirt tutorial from Scattered Thoughts of a Crafty Mom. I made a size bigger for my nieces and added buttonhole elastic to the back as well.

For the pocket tshirts I used the tutorial from See Kate Sew, before you cut your fabric, just hold the template up to your shirt as I found them to be too big.

And for my newest sister in law I tried adding flutters to this cute store bought romper, I didn't take into account the fraying edges until I'd already started. It's probably not going to be a problem since babies outgrow clothes so fast, but if I ever do this again I will use lace since it doesn't fray.

Tuesday, 22 March 2022

Pocket Tshirts

 Making pocket tshirts is a quick gift idea, perfect for kids and adults! I think these are going to be my go to Christmas gifts, they don't cost much in time or money so they're perfect for the most expensive time of year!

I used the scraps from the pillowcases I made for the kids birthday presents for their pockets since I already knew they liked my fabric choice. Even my almost adult nephew said he wanted a spiderman one!


I used the tutorial and template from See Kate Sew, I did find them too big so just hold the template up to the tshirt to make sure you're happy with the size before you cut your fabric.

Tuesday, 8 March 2022

More peasant dresses

 I made two more of the free peasant dress from Scattered Thoughts of a Crafty Mom. Such a quick and easy sew, especially when you leave the elastic out of the sleeves.

When I was going through my photos to clear space I found this photo of a peasant dress that I made in 2020, but I don't actually remember making it! The blur of the long hours spent making everything at Christmas time clearly muddled my brain while I was pregnant. I've had this fabric in my stash for so long but I believe it was a Christmas fabric from Spotlight.


I also made one for my baby using this fabric from Spotlight. I love the colour blue and much to everyone's annoyance I can't stand pink so I love being able to sew pretty girl clothes in my favourite colour! 


You can see my first peasant dresses I made here.

Tuesday, 1 March 2022

Easter Headband

We never do anything at Easter other than relax and enjoy our extra long weekend! Last year being busy with a newborn I suddenly realised a couple of days before that I didn't have anything Easter themed to photograph her with. So I googled and found a cute template, pulled out my felt and fake flowers and thankfully managed to create this the night before!


Unfortunately I never pinned the site so now I have no idea where I found the template. All I can find is this image which I *think* is the correct one - but the link goes nowhere.

Tuesday, 13 October 2020

Pillowcase dress

 I'm trying to be organised this year so I've started planning all the kids Christmas presents, and I want to get all of this years birthday presents finished!

So here is a December birthday present finished and ready to wrap for a 2nd birthday present.

I used this tutorial if you wanted to try sewing one yourself. The binding is a little tricky, but I just sewed really slow and I'm happy with how it turned out. I opted to make size 3, as I figured it's better to be too big rather than too small.

Friday, 8 January 2016

Reversible Vest

Awhile back (I think it was for Christmas 2014) I made a cute little reversible vest for my baby nephew. I found a tutorial online with a free pattern (size 18 months) which was lined. I figured since a fair bit of it was lined that I might as well make it reversible which led to me finding this tutorial for a reversible vest (size 12 months).

My combination of these two great tutorials and patterns looked cute on my nephew, and it was nice that I could sew something special for him.


Sorry about the photos, I really need to learn to finish gifts early so I have time to take the photos, along with spare time to retake them when they don't turn out that great.

Stay tuned, my next post will be for the Newsie Cap from Peek-a-Boo Patterns I made for his birthday to match this vest!

Friday, 13 September 2013

Lace Windows

The front windows in our house have fixed panes underneath - which is great for letting in light, but it also makes it easy for Trixie to see lots of things to bark at outside! In the past I have just stuck wrapping paper over those fixed panes, but after all the time spent painting those rooms and cleaning the window frames I just couldn't justify taping paper there again!

Pinterest is brilliant, but I never seem to have enough time these days so I haven't been on the computer a lot lately, luckily a few weeks ago I found the perfect solution!

The pinned photo pointed to Annabel Vita's blog where she used cornstarch to 'glue' lace to her windows for privacy, while still allowing natural light through.

It was a little awkward trying to cut such big pieces of lace to the right size, then attempting to get them to stick, but eventually I finished the first window.


I am so happy with how it turned out! I have noticed that I need to redo the corners, but it still looks good from both inside and outside! Trixie however is not as impressed and now needs to be taught not to jump up to look out the window - no matter how cute it looks to see her standing there watching you as you come home. 

There are two more windows to do, now all I need to do is make the time...

Friday, 23 August 2013

Tissue Paper Flowers

My grandma gave me a flower punch for my birthday, which happened to be around the same time that I found this tissue paper flower project on the Fiskars website.

This is one of those projects that I, for some reason, just made more and more of without any plan of what I am going to do with them!


They look really pretty individually, so for now I will just keep filling up the box until I figure out how I want to use them. Either way, it is another good project to work on while watching tv.

I reused some of the tissue paper from gifts I have received, so perhaps I will continue the gift wrapping theme and use these flowers rather than the stick on bows I normally buy.

Thursday, 11 July 2013

Spotty bird

Quite awhile back I found this cute pattern by Spool Sewing and now that we finally bought a new printer I printed out the pattern made one of their cute birds! I over stuffed mine, but I think he still looks cute sitting with my orchid.


It was a nice quick project, and I'm thinking it would be cute to add some little wire feet to the bottom. 

Now that I have had my creative distraction, I really ought to get back to the projects that need to be finished!

Thursday, 16 May 2013

Envelope Clutches

I have been on a bit of a sewing kick lately - and have also been having a hard time finding things I like. So of course I had to make a purse to go with my new red and black dress. I found a great pattern from See Kate Sew for an envelope clutch that I decided to try out. 

I only wanted a small clutch so I printed the pattern out at 60%. I made up a test one using my blue leopard fabric (leftover from my dads tie) and it ended up being the perfect size!


And of course there never seems to be any nice black and red fabric around here lately so I did the next best thing and added some red to my black fabric...


What started out as an experiment turned out to be pretty cool - definitely an option when I can't find fabric in the colours I want. It ended up being pretty fun to just sew back and forth without having to concentrate! 

I'll definitely make this envelope clutch again with crazy blue thread fabric.

Thursday, 25 April 2013

Mattress to Floor Cushion

Ages ago we bought a new mattress to replace my old foam mattress - which I kept (you know, just in case) until I started to get sick of all that space it was wasting! But I still didn't want to throw perfectly good foam away...

So when Trixie was a puppy she got adult doggie sized mattress pieces as beds and the rest was cut into squares to eventually become floor cushions - and those squares have sat, wasting space for nearly two years! 

Until yesterday when the first experimental cushion was finally completed!


And of course, I didn't find a tutorial on making boxed cushions first - obviously I love to waste time unpicking fabric. After unpicking I just had to try and figure it out myself with some spare fabric, after more frustration I finally googled the solution! If you are interested in how to create the perfect corners just look at the pictures on this web page - you don't even need to read it since the picture explains it all.

Since I have furry pets everything has to be easily removed for washing so I added a nice big zip that extends  over the two corners.When I saw the price of the long zips at Spotlight I almost considered just using velcro, but luckily I noticed the rolls of zips underneath the racks. The zip I chose was only $3 for a whole metre!


Now I just have four more cushions to finish. I've been thinking I need to have a go at using piping for the first time...

Friday, 22 February 2013

Create for 365 days - January 2013

Only 6 more days of February to go for my 365 day challenge! 

307: Obi style belt for a gift. Tutorial by Casa Crafty on SewMamaSew. Check out my blog post here.
308: Black glitter spiral gift tag.Check out my tutorial here.
309: Agate wire wrap pendant for my little sister.
310: Squiggly obi style belt for my little sister. Tutorial by Casa Crafty on SewMamaSew. Check out my blog post here.
311: Black glitter cat gift tag. Check out my tutorial here.
312: Little stamped then watercoloured birds gift tag.
313: Stamped colour-in gift tags for my nephew.
314: Beeswax liquid soap. Tutorial by Heavenly Homemakers.
315: Chocolate liquid soap. Tutorial by Heavenly Homemakers.
316: Silver glitter flower and stars gift tags. Check out my tutorial here.
317: An attempt at wire wrapped pendant using an odd shaped acrylic bead.
318: Stamped toucan watercoloured gift tag. Love this one and might keep it forever!
319: Monkey's fist knot - which the cat broke pretty much straight away!
320: Mounted my baby elkhorn that my mum gave me onto a piece of tree trunk.
321: Colour-in pencil case for my nephew. See my blog post about it here.
322: Peanut stone garden marker.
323: Windows obi style belt for my little sister. Tutorial by Casa Crafty on SewMamaSew. Check out my blog post here.
324: Painted mushroom rock which I then varnished.
325: Chilli stone tag.
326: Kumihimo disc and my first braid using this tutorial. Be ready for major hand cramps if you try it!
327: Made the squiggly obi style belt smaller so it would fit my little sister. Tutorial by Casa Crafty on SewMamaSew. Check out my blog post here.
328: Black ink shell yellow gift tag.
329: Glitter heart magnet.
330: Red glitter heart tag and card. Check out my tutorial here.
331: Watercolour flowers.
332: Etched lolly jar for my nephew.
333: Grey and white fabric coaster - first ever! Next time I will use a tutorial and the right fabrics!
334: Ray's lunch box! Proud of myself for finishing but it was horrible to make!
335: Tote bag for my nephew.
336: Painted mushroom rock - didn't varnish this one as I want to test and see how long each will last outside.
337: Origami balloon flowers for my SIL. See my blog post here.

Tuesday, 29 January 2013

Obi Belts

Quite awhile ago I saw a cute obi style belt on Pinterest - which I didn't pin! Luckily I found it again when I thought it would make a great birthday gift for my sister. Note to self: pin it if you like it! 

While I had originally decided to make this belt for my sister, I did make this for someone else as their birthday was first. It turned out great, but this blue leopard print one I made was too big for me - which meant it would be too big for my sister as well. 


When I made the first one for my sister I reduced the length by about 3 inches (from the back piece as well as the sides). It was still slightly too big for me so I decided to hold off making the second one until she tried it on. 

And it turns out I needed to take off another two inches which I just did from the two sides this time. Lesson learnt - measure your waist first when making belts! 


It was an easy belt to sew up, and you really can make it from one fat quarter! You can get the Obi-Style Belt tutorial and pattern from Sew Mama Sew and you can also visit Casa Crafty who created the Obi-Style Belt!

Friday, 18 January 2013

A tie for my dad!

It was my dad's birthday last month, and it took me almost a month to finally finish his birthday present! Luckily he is patient, and doesn't mind. 

I decided to attempt making him a tie using some blue leopard print fabric I found. I now know why ties seem so expensive... 

They take a lot more material than I thought, and it took me so long to sew it all together - especially hand sewing that last seam! 


I did forget to add the little bit of ribbon on the back to hold the end of the tie, eventually I will remember to finish it off for him. 

The pattern tutorial I used was this one from Georgia Leigh. Since I used quilting cotton for my tie I opted to only use interfacing in the front piece, not through the whole tie. I also added about an inch to the length since my dad is tall. Using the cotton makes the tie a little difficult to tie, and slide around to readjust. 

Overall, I am happy with how the tie turned out, but I don't think I will be making another one anytime soon!

Sunday, 16 December 2012

German Paper Stars

I went a little overboard recently when I found a tutorial for a really cute paper star! I was orginally looking for origami Christmas ornaments when I found some instructions on how to make these German Paper Stars. The instructions I found were far to confusing but after a little more searching I found a great YouTube tutorial. I still had to pause and go back a few times but it was easy once I worked it. 

And after cutting far too many strips of paper, I now have some new ornaments to add to my tree... 


I haven't decided what to do with the little stars yet, maybe a garland for the window - I may have to make more though and I'm not sure I'm up to it anymore! 

If you are up for a paper folding/weaving challenge you really should give these stars a try. And might I suggest you don't start making them with 6mm paper strips like I did. I really don't know what I was thinking when I cut all those strips! 

I have lots more of my crafting adventures to share with you, once I get the time. You gotta love Christmas...