I foster kittens every now and then for my local cat rescue. I shared a photo of my foster cat Chaos in a post about a wood burnt cat spoon, he is my cat now. My husband finally let me keep him after Chaos got crystals in his urine, I guess he saw how upset I was at the possibility he might die. Either way, Chaos is a special little character and luckily he has found his forever home with me.
Our rescue has wonderful creative supporters that donate their handmade items for us to sell so we can raise money to care for unwanted cats and kittens.
We had organised a market stall so I decided I would make a whole lot of cat phone charms that we could sell. After the market stall I needed to make a stand so they could sit at the vet where we get all the vetwork for our rescue cats.
I made some of the phone charms with the loops used for the older phones that had the little spot to loop it through. They still work great to attach to keyrings, zips, car mirrors, etc. But they don't work with new phones, so I found earphone dust plugs to create charms for those phones.
The tree stand I got for Christmas time originally had bells in all the holes and wasn't very stable with all those charms on it so I made a base and glued it in place. The original charms with loops hung off the branches easy enough. The dust plug charms didn't fit over any branches so I used the holes where the bells were and attached an earring hook with a jump ring so I could hang them.
I didn't take a photo of the non Christmas tree I made, but I just drilled holes and inserted wire to create a hook on either side of the branches.
These trees are a great way to display small items for sale - and they don't need to be specifically for jewellery.
Showing posts with label beads. Show all posts
Friday, 8 April 2016
Thursday, 1 March 2012
Create for 365 days
I have been reading a lot lately about people who are aiming to do something everyday for 1 year. The most common goals are to take a photo every day or complete a drawing every day. I have been thinking how fun this would be, only I am no good at photography and certainly couldn't do the same thing every day. That and I would probably forget or it would feel like a chore doing the same thing each day.
So I am going to aim to complete something creative each day. It gives me the freedom to switch between my crafts as I normally do and allow for proper drying time. If I don't have the time then I can make something small like a phone charm or a piece of origami. It also allows me to do big projects little bit by little bit without feeling the need to rush them, while still having time to complete something else that day.
Instead of thinking constantly about finishing something for a whole year I am going to focus on a month at a time. So today I will start "create each day for March".
Today I finished a beaded bracelet. I have been making this style of bracelet for a few years now and have finally made one for myself! It is a lot heavier and bulkier than I would normally wear or even make. I'll see how it fares next weekend.
So that is one creation finished. I have made a Flickr account where I will try to add a photo of my finished item each day. Here's hoping that we have lots of sunny days for the next 364 days!
Sunday, 22 January 2012
Beaded People
I found my cute little beaded people that I made when I was
about 13. As cute as they are, they aren’t good as earrings - my hair was continually
getting caught around them! I remember making little beaded people on keyrings
to give as Christmas presents to my friends – in their favourite colours of
course!
I look at them now and think about how much I have learnt, I
really should make a couple just so I can see where I have improved … or how
much of a perfectionist I am when it comes to my crafts!
The patterns for these were actually in a kit of my mum’s
with the instructions on a little folded up sheet of paper. Needless to say,
once she showed me the instructions there wasn’t very much left in her kit! I
never did make all of the little dolls as I wasn’t interested in the soldiers
and goblins. I will have to make a complete set of these one day.
Oh and I
should give the instructions back to my mum!
Sunday, 15 January 2012
Beaded Keyrings
I have been trying to organise our house a little better to
make it look tidier and less cluttered. While going through my boxes I found
the keyrings that I love to make so I thought I would share with you the ones I
currently have.
I really enjoy this sort of beading as I just pick a theme
and keep wiring on beads until I am happy with how it looks!
I also have a photo of the keyring I made for myself. As you
can see I have three of the lobster clasps on mine – one to hook onto my bag,
one for the ALDI trolley token since I never keep coins in my wallet and the
other is to hook on the key to whichever car I need to drive. My house keys are
threaded onto the split ring since I never take them off. Far easier than
having everything on one keyring and as long as I have my bag I won’t forget my
keys. The other bonus is that I don’t have a whole lot of heavy keys hanging
from the car’s ignition – apparently that is bad for it…
Friday, 16 September 2011
Wedding - Part 2
Well I took the last photos if my wedding crafts, so here are the rest of my ideas and craft projects.
I love growing chilli plants, purely because of the way they
look and luckily the colour of chillis matched the red theme for our wedding!
So for my centerpieces I wanted living plants. Originally I considered bonsais
but I don’t have much experience with those. Then I decided to use some glass
bowls I found at Ikea to make a kind of terrarium with chilli plants and
succulents. Unfortunately the plants didn’t grow as fast as I hoped so they had
no chillis on them for the wedding, they had started flowering which was better
than nothing!
I also made little origami lights using vellum then popping
leds connected to batteries inside (basically LED throwies). They took me
forever to fold as I made 50 of them but I now know how to make them without
the instructions and they are easy enough that I can watch tv at the same time!
I didn’t want a normal wedding cake because we were already
having dessert so not many people would eat the cake anyway. I was considering
cupcakes, and also cheesecakes with all different sauces that people could put
on themselves. Then I decided that lamingtons would look cute and they tasted
so good especially since I got them with jam inside. I also got a lamington
cake purely for the cake cutting. Best thing was it only cost $100 for the cake
and about 60 lamingtons from a local bakery!
I bought a bamboo cake stand which did have a pole handle on
the top section so I just bought a bolt to hold the top plate on without the
pole. The cake covered it so no one even knew.
The cake toppers, I originally wanted those rhinestone
letters and started making them. Then I changed my mind and started making
little clay pandas with a bamboo stand. But that didn’t work out too well and I
never bothered to finish… maybe one day so I can add it to my panda collection.
In the end I used a set of salt and pepper shakers that my big sister bought me
- they are kissing pandas that have magnets for mouths to hold them together.
To add to my little addition of chillis to the wedding I
made little chillis of out marzipan that I coloured with food dye. They were
quick and easy to make and looked cute sitting on top of my lamingtons. I made
them a couple of days before the wedding as they absorb moisture easily.
For my invitations I spent ages designing and carving a bamboo stamp for the invitation and another
one for the envelope. They worked well until I super glued them onto pieces of
wood – I guess it needs to stay flexible. In the end I just scanned the image
into the computer and printed it off at the same time as the invitation text.
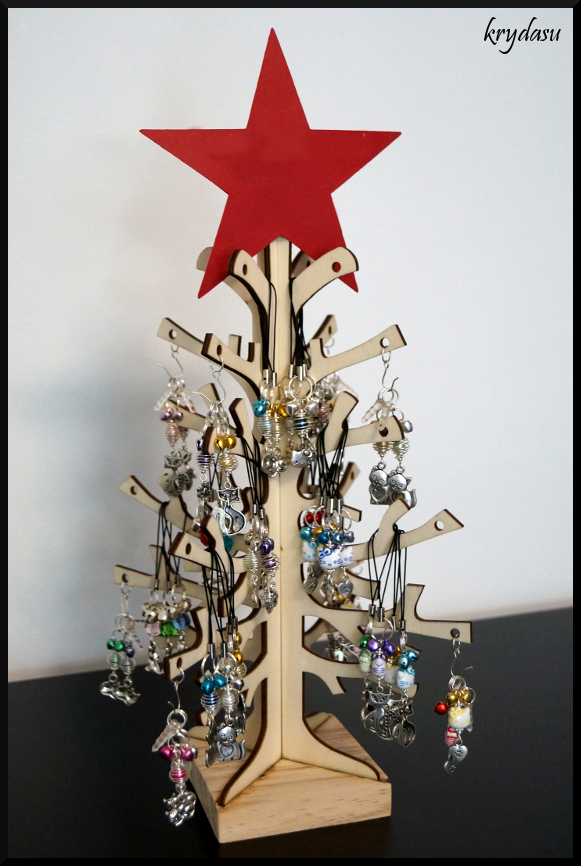
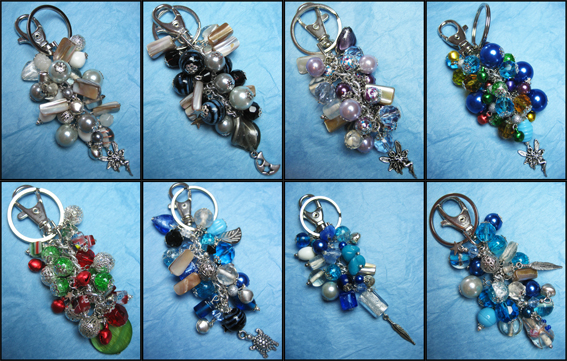
My favourite DIY from the wedding was the jewellery! I used
swarovski crystals, black onyx, moonstone, myuki seed beads, metal spacers and
lampwork beads and more I am sure. I learnt a lesson when making jewellery –
give your hands a break otherwise you can’t get anything done because your
fingers are so sore after days of twisting wire! I actually didn't get any specific photos
taken of the jewellery I made for the wedding but afterwards I took photos of
what I made for myself in case I lose them or break them.
Monday, 12 September 2011
Wedding - Part 1
When we started planning our wedding I wanted to do as much
DIY as I could – obviously I couldn't do as much as I wanted but I thought I
could share my ideas with you.
I wanted our wedding to be a bit different, not what
everyone was expecting. For starters I wore a red and black dress that I got
made in China. It was my second dress that I ordered as they made it to the
wrong measurements. I chose a different company, and a different dress and got it
made in a standard size – which didn’t fit me properly. I took it to a
dressmaker to get it fixed but she said no (because she believed a bride should
wear white)! So my talented mum fixed my dress and made it perfect! She also
made her own dress while fixing mine and also altering my little sisters
bridesmaid dress and making the sash I wanted.
Instead of holding bouquets of flowers I bought lace
parasols that also had matching fans - mine were black and my sisters were
white. I spent a lot of time trying out origami and beaded flowers but I didn’t
really like any that I made.
Instead of flower boutonnieres I made them using feathers
that I dyed red and black. I made those for my husband and his best man, our
fathers and grandfathers and for our mums and grandmothers I added some beads
in with the feathers. I also made mine and my sisters hair pieces out of the
red and black feathers but added peacock feathers as well.
For our bon bons I wanted something different that reflected
both of us a little. I found these mini metal bookmarks that you could decorate
yourself and thought they were perfect. Ray and I both enjoy reading, as does a
lot of our family so I thought they could be rather handy for a lot of our
guests. They worked out to about $1 each in materials. I used moonstone because
I like the colourful sheen they have in them. These also started the ideas I
had for the full size metal bookmarks I make. We also had little red heart
lollipops on the tables for the guests.
Subscribe to:
Posts (Atom)