Showing posts with label cross stitch. Show all posts

Thursday, 2 May 2013

Windmill Cross Stitch

Last week we celebrated Opa and Oma's 50th Anniversary and I had a brilliant idea to create a cross stitch for their gift. I took a photo of a Dutch windmill from their tablecloth and started an attempt to create the cross stitch pattern myself - which was far too difficult! So I found a great website called Pic 2 Pat where you can upload a photo and they will generate a cross stitch pattern for you. It is a really easy to use, free online program which saves a lot of time when creating a custom cross stitch pattern.

With the colours being all over the place for this pattern it took a lot longer than I'm used to, but in the end I finished at least one square each day. 


And of course with a handmade gift you need to give a handmade card so I used watercolour pencils to create a bright flowery card!

Tuesday, 5 March 2013

Feather Cross Stitch Pattern

I have been wanting to add another cross stitch to my "coaster wall". I really should take an updated photo of it!

Quite awhile ago I started creating this feather cross stitch pattern which is finally ready to share with you. If you would like to see my other free patterns you can simply click the cross stitch tab at the top of my page or click here.


I chose to do this one in red to bring some more colour into our office. I'm considering doing a mirror image of this in blue for my wall as well.


I hope you enjoy my latest cross stitch pattern!

Monday, 3 December 2012

Koi cross stitch coaster

I found the cutest cross stitch pattern on pinterest one day and knew I had to somehow turn it into one of my wall coasters! 


I had to add extra stitches to all sides to make it fit the coaster, but it is such a cute pattern. 

If you like this pattern you can get it (for free!) from Cross Stitch Happy

I didn't have any blue aida and attempted to colour my cloth using watered down acrylic paint. It did work, but unfortunately I watered down the paint too much and it turned out very pale. 

If you're looking for more cross stitch patterns you can also check out my pinterest board.

Tuesday, 27 November 2012

Cherry blossom cross stitch

I have finally finished my cherry blossom cross stitch!!! 


The finished size of this piece is 72cm x 24cm. I still need to make a frame for it, but that won't be until I finish my similarly sized bamboo cross stitch. And no, I have no plans to start that one anytime soon - I'll be sticking to small cross stitch pieces for now! 

I decided to share a photo of the back as I always wonder what the back of a finished cross stitch looks like. On this piece I tried to remember to keep it neat, but I still didn't pay enough attention in some places. 

I am very happy to have finally finished this piece, now if I only I could get myself to finish my other projects that have been started and promptly abandoned!

Sunday, 11 November 2012

Mounting Cross Stitch to MDF Coaster Tutorial

As promised, today I am showing you how I mounted my finished love birds cross stitch to the MDF coaster. 


I apologise in advance for my photos, I really need to get someone to take the photos for me rather than trying it myself - that or try out a video tutorial! 
What I use...

Nail file (or sandpaper) 
White paint 
Sponge brush (or paintbrush) 
Paintbrush for glue 
PVA glue 
Watered down PVA glue 
Scissors 
And most importantly your finished cross stitch piece 


1. Remove the sticker. They annoy me so I do it, but it isn't necessary. 

2. Sand down all the edges with your nail file or sandpaper. I know, it seems weird, but I always have a nail file in my pen holder as it is far more convenient for crafting. 


3. Using your sponge brush or paintbrush paint all the edges with white paint. I like to smooth the front and back where the paint pools so there are no bumps. For better coverage I do two coats. 

4. Paint the front of your coaster white. Since I used white AIDA I don't want the brown MDF background showing through the holes. 


5. I have done two coasters so you can see what the front and back look like. Allow this to dry thoroughly before moving on to the next step. 

6. Give the front a nice even coat of PVA. Remember it will soak into the AIDA and the floss a little. 


7. Carefully position your cross stitch on your coaster. Try to line up the rows with the sides of the coaster. Avoid pulling at the AIDA as it will stretch out of shape. In the case of the love birds I lined up the branch first to make sure the stitching goes right to the edge of the coaster. 

8. Once you are happy with the positioning you will need to press down on all sections of your cross stitch. Don't rub it, just keep pressing the AIDA down into the glue as it dries. Pay particular attention around your stitching as this is where the cloth lifts the most. 


9. Once your PVA has dried and your cross stitch piece is glued in place, flip it over and give the back two coats of watered down PVA. This step is optional - I use Blu-Tack to hang these on the wall and have found if it isn't sealed the Blu-Tack will pull away a little layer of the MDF each time I try to move it. 

10. Use your scissors to carefully trim the excess AIDA. I trim as close as I can, but you have to be careful not to cut into your coaster as you will ruin the painted edges. 


11. As you can see it is now nicely trimmed with no frayed edges and the glue is holding it well. 

12. This is a rather useless photo but it is an important step! You need to seal the edges so the AIDA and any cut stitches will not fray. Simply use your paintbrush to put a thick layer of PVA all around the edge - make sure you are getting both the AIDA and the coaster edge. Do two coats. 


13. Again this is another useless photo where I was trying to show that I have used the PVA on all the edges and to prevent those stitches I cut from coming loose. 

14. My piece is now ready to be added to my coaster wall

I hope this tutorial helps you get creative with your cross stitch displays. Let me know if you need any more help, or if anything doesn't make sense.

Tuesday, 6 November 2012

Love Birds Cross Stitch Pattern

I made a new cross stitch pattern to suit an mdf coaster so I can show you how I mount the completed cross stitch. 

This cross stitch features two love birds which are based off the wedding gift I made for my SIL and her husband. 

It looks quite cute on my wall and I have to say I quite enjoy these small, simple cross stitch patterns - mostly because they are quick to complete! 


As usual, you can simply right click the above image and save as or you can download the jpg through google docs

I hope you enjoy stitching up these two sweet little love birds! In the meantime, I have taken photos and will get that tutorial ready for you soon!

Thursday, 25 October 2012

Bamboo Cross Stitch Pattern

As promised last week I am sharing my bamboo cross stitch pattern today. 


I sized this pattern specifically for the MDF coaster I wanted to mount it on so you may need to extend the bamboo stitching a little. 

If you are interested I used the Boyle MDF coasters which I buy from Bunnings. 


I have posted it as a jpg so you can just right click and save as or download through google docs

Have fun stitching!

Sunday, 21 October 2012

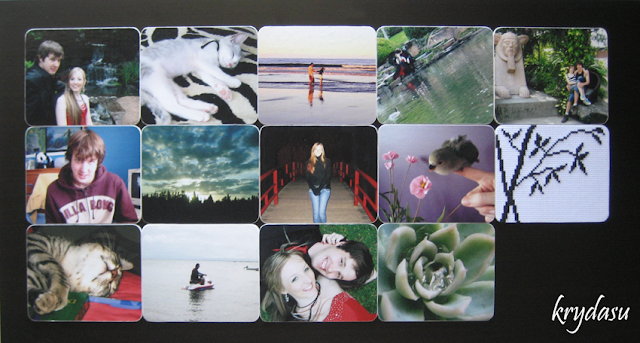
Coaster photo wall

Back in April I had what I hoped would be a brilliant idea and started working on this never ending project... 

The idea was to use little MDF coasters I found at Bunnings to create a photo wall! Obviously this project will take a long time but the idea is that once I have a wall full of them I can just change around or switch out old for new. At 69c each it is a cheap project and being MDF I can just Blu-Tack it to the wall without the worry of hearing photo frames crashing to the floor! 


As you can see it looks great when they are all laid out together - all I need to do is pick which wall I want to use and then decide what colour to paint the wall! 

I ended up getting the idea to add a cross stitched coaster to my wall, and luckily it seems to have worked the way I saw it in my head. I'll share that bamboo pattern with you in my next blog post. It is a little fiddly mounting it onto the MDF coaster but so far it is holding well - I'll get started on another cross stitch piece so I can share with you how I mounted it. The only thing I am worried about is whether the glue will cause the aida to yellow over time. 

I hope this gives you new ideas for displaying your favourite photos (or artwork)!

Thursday, 20 September 2012

Cross stitching in the car

Before we left for Canberra I was trying to think of a couple of crafts I could do in the car. I chose to take along my 2 inch paper squares to make origami cubes and I chose to take along some cross stitch. 

I did take my large cherry blossom cross stitch just in case, but as I thought, I didn't end up doing any of it - it is just too big to do in the car. 

Instead before we left I decided I would make a couple of cross stitch magnet kits. I opted to create my own pattern based around a tree from my "Two-hour cross stitch" book by Patrice Boerens. I could have simply used her pattern but I wanted to make the most of the space available on the magnet. 


As you can see it is still quite similar but mine is taller and not quite as wide. Because this isn't my own original pattern, I won't be sharing it with you. It does show that you can easily make an existing pattern work for your needs with a little alteration! 


I had two magnets left so I chose to do a red one for Ray and a blue one for me!

Sunday, 24 June 2012

Currently Working On...

My big project that I am working on at the moment is one of the cross stitch kits I bought before we even had our first house.

The finished size of this piece is 40cm wide by 88cm high - way bigger than any cross stitch I have ever started! I'm used to doing little pieces so I have no idea why I thought it would be a good decision to buy two kits this size.

As it was so intimidating I started the flowers, quickly got over it and put it away for a few years. After getting it out again I opted to focus on the bottom half, completing one colour at a time and as you can see, so far so good...


I found it took me ages to find my place again whenever I came back to work on it so I made myself a grid with pink thread. It means I find my spot quicker and it makes it easier to check and ensure I haven't made any mistakes.

Hopefully once I finish this cherry blossom one I will promptly get started on my bamboo one! Then I can try my hand at making matching frames for them...

Wednesday, 21 March 2012

Bee Cross Stitch Pattern

I have been a bit cross stitch obsessed lately. Of my first 20 days of crafting, 5 of those days have been the completion of cross stitch pieces.

Today marks another day of working on a cross stitch pattern for my crazy bee. I have made up a pattern sheet to share with you. It is just a basic pattern sheet as I know I ignore the instructions that come with cross stitch kits. All I need to know is what colours to use and how many strands!

This is the first time I have ever made a cross stitch pattern, so please forgive the blurry lines! If I can get the quality any better I will let you know, but for now I feel it is legible.


If you want to see photos from my "Create for 365 days" you can visit my Flickr account. Or even easier - watch the slideshow located at the top left of my blog!

I think this would be a great cross stitch pattern for kids just starting out with half stitches. There are only 3 colours and each side is almost a mirror copy (it easily can be if you want the eyes in the same spot).

Oh and don't tell anyone but I didn't have any white embroidery floss... so I used my sewing machine thread! I now know embroidery floss definitely looks better for cross stitch, but I wouldn't drive all the way to the craft store just to get white floss - it is hardly noticeable.

I am adding this to the label of tutorials to make it easier to find the pattern.


* Edited to add this image of the pattern so you can simply right click and save as...