Monday, 7 October 2013

Wood burning

At one stage I decided I wanted to try wood burning, so I got out my trusty plastic melting soldering iron and had a play with some scrap wood. It didn't look that great, but I blamed it on the wood I used, along with the fact I was using a soldering iron and bought a proper wood burning tool anyway!

So far I am finding that while sometimes it is the wood that is the problem, for the most part I'm just not that great at it. It doesn't help that I only found one wood burning tool, and I don't think it's all that flash.

Rather than wasting  my time doing scribbles on scrap pieces of wood, I found a cheap pack of wooden spoons and got to work. 


Even though I'm a total novice, I'm happy to add these to my kitchen and hopefully with lots of practice I will get better - or I'll buy a better wood burning tool. 

With Christmas getting closer, these spoons will be put to good use making rumballs - let's hope that unlike last year we don't end up with another snapped wooden spoon!

Friday, 20 September 2013

Blobby Sketch

I realised that I hadn't done a blobby drawing in quite awhile which of course meant I went out and bought a new sketchbook - because I don't have enough of them already! I attempted doing a quick and simple blobby sketch... but of course I did my usual proportions which take far too long to complete.


And now that my drawing is complete as to my original plan, looking at it I think something is missing.

So do I decide to work on it a little more or should I just leave it as is or start a completely new page?

Although I could always finish one of my many other projects!

Friday, 13 September 2013

Lace Windows

The front windows in our house have fixed panes underneath - which is great for letting in light, but it also makes it easy for Trixie to see lots of things to bark at outside! In the past I have just stuck wrapping paper over those fixed panes, but after all the time spent painting those rooms and cleaning the window frames I just couldn't justify taping paper there again!

Pinterest is brilliant, but I never seem to have enough time these days so I haven't been on the computer a lot lately, luckily a few weeks ago I found the perfect solution!

The pinned photo pointed to Annabel Vita's blog where she used cornstarch to 'glue' lace to her windows for privacy, while still allowing natural light through.

It was a little awkward trying to cut such big pieces of lace to the right size, then attempting to get them to stick, but eventually I finished the first window.


I am so happy with how it turned out! I have noticed that I need to redo the corners, but it still looks good from both inside and outside! Trixie however is not as impressed and now needs to be taught not to jump up to look out the window - no matter how cute it looks to see her standing there watching you as you come home. 

There are two more windows to do, now all I need to do is make the time...

Friday, 6 September 2013

Toy Truck Succulent Pot

A certain little boy we know had his fifth birthday in August, so when I came across a photo of a dinosaur toy with a succulent growing out of its back I knew it would the perfect present!

I have lots of succulents that are multiplying so finding a plant was no problem - finding a good size dinosaur however turned out to be impossible. In the end we decided he would like a truck with a plant in it just as much.


It was easy enough to do, I just grabbed my soldering iron (I have one specifically for melting plastic) and melted/cut a hole from the top, as well as melting drainage holes in the bottom. Fill it with dirt, stuff a plant in and it's all done! Quick, cheap and easy while also being the perfect gift for a five year old who loves gardening!

Friday, 30 August 2013

Eyelet Ribbon Hand Towels

I recently had a housewarming party to go to which meant thinking of a useful gift that I could make. I always find it hard trying to think of gifts for people who already have everything they need, rather than adding clutter that they won't ever use.

So I opted for hand towels trimmed with ribbon. With little kids they will always come in handy - and while my thought process is that hand towels are for use in the kitchen or bathroom, a small towel can have multiple uses!


Originally I picked a red polka dot ribbon, until I saw this pretty eyelet ribbon - I bought both and finally decided to go with the eyelet. I trimmed both towel ends with the ribbon, doing a straight stitch along the top and bottom where my white stitches would be hidden. For the ends I chose to do a satin stitch to prevent any fraying as well as to disguise the ribbon end a little.

These are easy enough to make and I figure they would be a good gift to make in advance and keep on hand in case of any last minute parties. I might even make some for my own house!

Friday, 23 August 2013

Tissue Paper Flowers

My grandma gave me a flower punch for my birthday, which happened to be around the same time that I found this tissue paper flower project on the Fiskars website.

This is one of those projects that I, for some reason, just made more and more of without any plan of what I am going to do with them!


They look really pretty individually, so for now I will just keep filling up the box until I figure out how I want to use them. Either way, it is another good project to work on while watching tv.

I reused some of the tissue paper from gifts I have received, so perhaps I will continue the gift wrapping theme and use these flowers rather than the stick on bows I normally buy.

Friday, 26 July 2013

Padded Camera Strap Cover

We spent a lovely day at Australia Zoo this week, which meant playing with my new camera. Luckily the day before we went to the zoo I decided to try out the bigger lens when we took Trixie for a walk - the strap that comes with the camera is incredibly uncomfortable, especially with the heavier lens!

So that night I quickly made a padded cover for my camera strap!


The padding in the strap really helped my neck, while the zebra fabric matched the zoo theme - in particular the African exhibit!


Using the bigger lens was definitely worth it to get photos as close as this! I will be making myself a new strap with a lot more padding before our next big outing.

Thursday, 18 July 2013

Custom Camera Case

After finally getting my new camera, I realised I would need a case for it! But of course I don't want to carry around a camera bag as well as a handbag so I opted to buy a small camera case that I could then put in my handbag.

I found a cheap one on eBay that was plain black and would fit in my handbag along with all of my other necessities... but I got this one with Canon EOS written on it!


For the price I paid, I quickly got over it and decided I might as well see if acrylic paint lasts on a camera case as well as it lasted on my stone mushroom (which is still going strong in my garden).

So I painted that front section blue, which means I no longer have a Sony camera in a Canon case. I wasn't expecting it to turn out that well, but I have to say it actually looks good! I painted it the same way I would if I was stenciling - brushing the paint on just moved it all around the vinyl (I think it is vinyl). It took quite a few layers to get the coverage I needed.


So far the paint is holding up well, if it stays nice I plan on painting flowers on it similar to my blog banner. The blue paint has to last for a couple of months worth of general wear and tear before I decide to put in the time and effort!

Thursday, 11 July 2013

Spotty bird

Quite awhile back I found this cute pattern by Spool Sewing and now that we finally bought a new printer I printed out the pattern made one of their cute birds! I over stuffed mine, but I think he still looks cute sitting with my orchid.


It was a nice quick project, and I'm thinking it would be cute to add some little wire feet to the bottom. 

Now that I have had my creative distraction, I really ought to get back to the projects that need to be finished!

Thursday, 4 July 2013

New Ironing Board Cover

I have been sewing for over a year now, and have only just sewn a new ironing board cover! I have bought covers for it that have never fit properly, but accidentally ironing a piece of interfacing onto my ironing board gave me the push I needed to actually start this project!


Luckily I had plenty of the grey and white IKEA fabric leftover from my first floor cushion. This was a pretty quick project to sew, apart from threading all that elastic cord through the casing. 

Now I have an ironing board cover I actually like, and one that fits properly - the joys of being able to sew!

Thursday, 27 June 2013

Stone mushrooms for the garden

Back in January I glued together some river rocks and painted them to look like little mushrooms. Because I wanted them outside I varnished the first one and set it aside to cure for the required two weeks... then I wondered if all that time and extra effort was necessary. So on the 7th of February I put one painted, varnished and cured mushroom and one painted mushroom in the garden as an experiment.

Painted and varnished
Painted only
Nearly four months later, and both of my mushroom rocks are still looking great! You can see that the shiny one in the front with lots of spots is the varnished one.


What prompted the idea that the varnish might be unnecessary? Every time I clean the bathroom I see that bit of blue acrylic paint still stubbornly sticking to my sink! If regular cleaning with bleach doesn't remove it, in theory a painted rock should look great in my garden for quite awhile.

Thursday, 20 June 2013

Origami Cymbidium Orchid

For the month of June, I decided to make the Cymbidium Orchid origami flowers from the book "Origami Flowers: Popular Blossoms and Creative Bouquets".

These flowers took me a couple of tries mainly in getting the coloured section to end up in the right place! I'm also not entirely sure of how to crease it properly in the final step.


I probably won't make these again, especially when I have an advanced origami book with a beautiful orchid in it! I'll have to give that flower a go again one day just to share it with you - as well as try out some more pieces from that book.


Origami flowers I have made from this book:
January: Balloon Flower
February: Blue Star
March: Cyclamen

Thursday, 13 June 2013

Squiggly Sewn Cushion Covers

I made a couple of cushions for my sister's birthday back in April - after a lot of frustration! Lately I haven't had much luck finding fabric for specific projects, and yet again I couldn't find anything I liked in red and black.

You might remember seeing a post I did for the envelope clutches where I just sewed heaps of random 'squiggles' on black fabric. Since I was really happy with my personalised fabric I decided to use that idea for my sister's cushions - after checking mum's opinion first of course!


I think they turned out great - although they were impossible to photograph. It is still enough of a novelty that I enjoyed the crazy sewing process and have added the need for my own squiggly cushion to my project list.

I'm starting to think I shouldn't look for fabrics for specific projects, rather I should buy the fabric I like and think about what to use it for later on...

Thursday, 6 June 2013

Trixie's New Jeans Bed... so far

I've started working on a new bed for Trixie to fit on my side of the bed - and yep it is again being made using the denim from old jeans. You might remember Trixie's original jeans bed which had the top piece made using whole sections of the jeans. This time though, I didn't want to spend so much time struggling to sew through all those thick layers! I also don't think I have enough jeans for this bed either which isn't inspiring me to hurry up and get it finished.

Because of the lack of fabric I opted to sew all the scrap pieces together to create a time consuming top piece. That idea was all thanks to seeing the Crazy Quilt Sewalong post over at Sew Can She - otherwise it would be tiny squared off pieces sewn together!


I'm pretty happy with how it turned out - especially considering a lot of the scraps I used were quite stretched out. If I don't forget about it, I  might also do some decorative stitching for the sides - similar to what I did on Dash's denim cat bed.

Now here's hoping I have enough of the old denim leftover to finish her bed sooner rather than later - Trixie (the spoiled dog) is not happy sleeping on a pile of blankets and instead chooses to sleep on her bed in the office by herself!

Friday, 31 May 2013

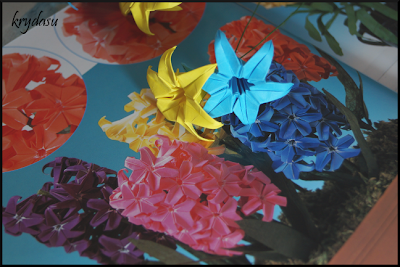
Origami Hyacinth and Morning Glory

Last week I was checking my blog so I could choose an origami flower for May when I noticed I had completely forgotten about the Morning Glory flowers I made last month! For whatever reason I really believed I had not only taken the photos, but also published a blog post about them - obviously I need to do some brain exercises...

For April I decided to try out the Morning Glory origami flowers from the book "Origami Flowers: Popular Blossoms and Creative Bouquets".

Apart from starting with a hexagon, these ones were quite easy to make. While they were quick to finish, I don't really like them and probably won't try them again/


For May I went with the Hyacinth origami flowers since I had mastered the fold needed to make the hexagon paper. 

I really like these flowers, however being a hyacinth you are supposed to attach about 20 of them all to a thick piece of wire. I decided I liked them as single flowers so I suppose they aren't really a hyacinth anymore!


I am thinking of making templates for all of the odd shapes rather than doing the special folds using square paper - especially since the original folds aren't always needed for the flowers. Either way it certainly is interesting to learn new origami techniques.


Origami flowers I have made from this book:
January: Balloon Flower
February: Blue Star
March: Cyclamen

Thursday, 23 May 2013

My Pets

On Saturday Karen from Sew Many Ways will be hosting Annie's Pet Palooza Birthday Party for her labrador Annie's 13th birthday!

I have always been an animal lover which of course means I have pets!

Nearly six years ago we got our first kitten - even though this kitten was meant to be Ray's, Dash is definitely my cat! The very first time I first picked him up he snuggled his head into the crook of my arm and licked my elbow. 
He has grown up to be a very vocal cat - especially when I am on the phone. He is gentle and actually stops playing rough when I say "ow". I taught him to sit for his treats and he also loves to sit on my shoulder or back. Being a typical cat, his favourite thing to do is sit in front of my computer or on top of any project I'm working on!


When we finally bought a house with a good sized yard we got a puppy who I named Trixie! She was a terrible biter as a puppy and I still have a couple of scars - and lots of holey clothes. The puppy biting phase was the only puppy issues we had, so I believe we were very lucky! Now however she is going through her teenager phase so I guess our luck has run out.
Being a border collie x kelpie we were expecting a high energy dog, mostly though she is pretty lazy. She loves to play fetch with pretty much any toy - with her favourite being the orange ball - well it was until I taught her to play frisbee!


And of course my rats! I have five at the moment and I still can't decide on names for them. They really do make great pets - although they are impossible to photograph! This is my new super friendly little fella that I got last week.


Then there are the fish which include my two male fighter fish, as well as our big tank that currently has a red tail black shark and some harlequin raspboras.


And I can't forget our most unusual pets - the snakes. We have two stimson pythons named Stellar and Theo and two bredli pythons named Mika and Bitey. Stellar is by far my favourite of all the snakes and she is the first one we bought. She is currently in hibernation which she chooses every winter, meanwhile our other snakes are still happily eating as the temperature drops!


Happy Birthday Annie!

Thursday, 16 May 2013

Envelope Clutches

I have been on a bit of a sewing kick lately - and have also been having a hard time finding things I like. So of course I had to make a purse to go with my new red and black dress. I found a great pattern from See Kate Sew for an envelope clutch that I decided to try out. 

I only wanted a small clutch so I printed the pattern out at 60%. I made up a test one using my blue leopard fabric (leftover from my dads tie) and it ended up being the perfect size!


And of course there never seems to be any nice black and red fabric around here lately so I did the next best thing and added some red to my black fabric...


What started out as an experiment turned out to be pretty cool - definitely an option when I can't find fabric in the colours I want. It ended up being pretty fun to just sew back and forth without having to concentrate! 

I'll definitely make this envelope clutch again with crazy blue thread fabric.

Thursday, 2 May 2013

Windmill Cross Stitch

Last week we celebrated Opa and Oma's 50th Anniversary and I had a brilliant idea to create a cross stitch for their gift. I took a photo of a Dutch windmill from their tablecloth and started an attempt to create the cross stitch pattern myself - which was far too difficult! So I found a great website called Pic 2 Pat where you can upload a photo and they will generate a cross stitch pattern for you. It is a really easy to use, free online program which saves a lot of time when creating a custom cross stitch pattern.

With the colours being all over the place for this pattern it took a lot longer than I'm used to, but in the end I finished at least one square each day. 


And of course with a handmade gift you need to give a handmade card so I used watercolour pencils to create a bright flowery card!

Thursday, 25 April 2013

Mattress to Floor Cushion

Ages ago we bought a new mattress to replace my old foam mattress - which I kept (you know, just in case) until I started to get sick of all that space it was wasting! But I still didn't want to throw perfectly good foam away...

So when Trixie was a puppy she got adult doggie sized mattress pieces as beds and the rest was cut into squares to eventually become floor cushions - and those squares have sat, wasting space for nearly two years! 

Until yesterday when the first experimental cushion was finally completed!


And of course, I didn't find a tutorial on making boxed cushions first - obviously I love to waste time unpicking fabric. After unpicking I just had to try and figure it out myself with some spare fabric, after more frustration I finally googled the solution! If you are interested in how to create the perfect corners just look at the pictures on this web page - you don't even need to read it since the picture explains it all.

Since I have furry pets everything has to be easily removed for washing so I added a nice big zip that extends  over the two corners.When I saw the price of the long zips at Spotlight I almost considered just using velcro, but luckily I noticed the rolls of zips underneath the racks. The zip I chose was only $3 for a whole metre!


Now I just have four more cushions to finish. I've been thinking I need to have a go at using piping for the first time...

Friday, 19 April 2013

No sew bird tent

My SIL just got a parrot and with winter coming up he needs a snuggly bird tent!

I know my SIL is worried about birds chewing fabric and rope and then getting it stuck in the crop, around their feet, etc. so I decided to make a no sew bird tent to avoid any sewing threads being chewed loose. As well as not sewing this bird tent I used polar fleece as it doesn't fray  - obviously this will still cause problems if the bird ingests bits of fabric so I'm hoping he doesn't enjoy chewing his new bed!


Since I was just figuring this out as I went along, all I can do is explain my process:
  1. Cut a base to 16cm x 11cm in order to support your bird - I used a takeaway container lid, just make sure it is plastic so your bird tent can be washable!
  2. Cut 2 rectangles from your polar fleece that are 22cm x 45cm. (this makes the sides 16cm x 14cm)
  3. Cut your notches 3cm into your fabric and space them 1cm apart. Do this for all four sides
  4. Next you need to secure your base between the inner and outer fleece layers directly in the middle. Snip some holes along each edge of your base and tie the layers together with your fleece strips. My strips were 1cm x 10cm and I used four of them for each side.
  5. Now the fun part begins - start tying the knots all around the outside edges...
  6. Lastly just poke some hanging holes through the tops with paper clips and your new bird tent is ready to hang!
I hope that makes sense for anyone who wants to make their own no sew bird tent!

Tuesday, 16 April 2013

Belly chain to bracelets

My mum brought over her belly chain the other day as it has started to tarnish and she can't get it clean.


Even though there are some badly tarnished sections, mum wanted me to make her some bracelets from the cleaner sections.


So far I have made two bracelets which look quite nice on - I just need to check if they are a good size for mum before I finish any more.

I found the belly chain to be made a lot differently to other jewellery I have pulled apart, which unfortunately means I can't nicely reconnect the different sections. Either way, it certainly has been interesting to pull it apart and see all the different techniques used!

And if you don't have any belly chains, you could easily try this with old necklaces!

Tuesday, 9 April 2013

Little Orange "Madison" Dress

In December I shared with you the little peasant dresses that I made for two of our cousins daughters. Since they turned out well it gave me a little bit more sewing confidence and I decided to buy my first PDF pattern. After lots of internet browsing I finally bought the Madison dress pattern from Peek-a-Boo Pattern Shop.

The reason I went with Peek-a-Boo Pattern Shop was that Amy is happy to allow her customers to sell the items they make using her patterns! I think it is great as now I can practice sewing and if I don't have a little baby to gift a dress too, I can put them aside to sell at my 'future' market stall.

Yesterday I finally finished making my first Madison dress using a cute floral fabric I was given for Christmas.


I decided to make the 12 month size in the hopes that it would be a little easier to maneuver than the smaller sizes. I haven't sewn with bias binding very much, so that was a little awkward but happily it turned out well. Other than that I chose this dress so I could try out buttons and buttonholes for the first time. I practiced the buttonholes a few times on scrap fabric and then I just hoped I wouldn't make a mistake or cut through the stitching. Luckily my buttonholes turned out perfectly and I didn't slip with my seam ripper!

Hopefully the next dress I make turns out this well!

Friday, 5 April 2013

Origami Cyclamen Flowers

For March I chose to try out the Cyclamen origami flowers from my book "Origami Flowers: Popular Blossoms and Creative Bouquets".


The cyclamen is a cute little flower, and I did once have a live plant - but I didn't do so well at keeping it alive. Besides that, indoor plants don't tend to live very long with indoor cats!

This flower was a little difficult to shape at the end, but they still turned out pretty cute! I do wonder if a thinner paper might work better for this flower - either way I quite like this particular origami flower.

Origami flowers I have made from this book:
January: Balloon Flower
February: Blue Star

Tuesday, 2 April 2013

Denim Cat Cushion

Last month I posted about Trixie's new denim jeans dog bed, which she loves. I had lots of scraps left over so I decided to make a cushion for our cat Dash as well.

Being a small cat he only needs a small cushion so I created patchwork pieces like I did for the bottom and sides of Trixie's bed. For Dash I decided to do a square cushion so it would fit nicely in his favourite spot on the desk without wasting too much space.


If you saw the photos of Trixie's bed you might have noticed that I used a pair of Ray's jeans which had red accents on them. I brought the red into Dash's cushion as well by playing with red thread and the decorative stitches on my sewing machine on every seam. I also used red zips on both cushions, not that they are really seen.

Luckily, after all the effort, they both love their new jeans bean bag cushions. Now I just need some more old jeans to cut up and create with!

Friday, 29 March 2013

Windmill Easter Gift

Happy Easter!

Originally for Easter this year I was planning on making the kids in our family some little bunnies - until we saw these little windmills at Kmart!


My little brother-in-law loves gardening so I thought these would be perfect. All I did was create a simple tag from cardboard to wrap around the post then I glued the two sides together and put a bunny sticker on it.

This is a quick, easy and cheap Easter gift that little and big kids will love!

Tuesday, 26 March 2013

Origami Blue Star Flowers

Today I was planning a post for the newest origami flower I learnt to make using my book "Origami Flowers: Popular Blossoms and Creative Bouquets" when I realised that I didn't post about the ones I learnt to make last month!


In January I tried out the Balloon flowers, and in February I opted for the Blue Star flowers.


This flower is a little awkward to make, but they turned out quite cute! I don't have the correct type of paper for the leaves, but my memo paper is great to practice origami with!

I am also doing a lot better with the floral tape, so I guess it was just me and not the tape that had issues!

If you are interested in origami flowers, keep checking back as I'm hoping to complete a new flower from this book each month of 2013!

Friday, 22 March 2013

Tree of Life Pendants

A few years ago I noticed a lot of wire wrapped tree of life pendants on the internet so I made one for myself! It is my favourite pendant to wear now - this is one of the few pieces that never goes into the jewellery box since it lives under my monitor so I can grab it as I'm leaving the house.

In September I decided that I should make a couple more so I wasn't wearing the same pendant every day.

The first one is my original pendant.
And after making another two pendants I still prefer my first one and haven't worn either of the new pendants! The last one I made using copper wire as the base, but unfortunately it doesn't really show through the wrapped wire. That pendant actually took forever to make as I used really thin wire.

Next time I will try adding seed beads as the leaves - I just need to buy more wire! I have also seen some really nice ones that use a cabochon as the background, but I think I need more wire wrapping practice before I attempt that.