Monday, 31 December 2012

Handmade Christmas Gifts 2012

First I would like to wish everyone a Happy New Year! 

I have been meaning to share the Christmas presents I made this year. I have been so busy this month, I really need to be more organised - between Christmas and all the birthdays at this time of year, I am quickly running out of time to finish birthday gifts! 

The good news is that I have decided on most of my Christmas gifts for 2013. Even better I can get started on them whenever I like... lets see how many I have wrapped and ready before December 2013! 

So this year I decided to make good use of my fabulous new sewing machine to make all of my Christmas gifts. The added bonus was that I got to practice my sewing skills and I now have a nice variety of scrap fabric. 

Because I like to make things fair, I had to think of a Christmas gift that would be suitable for all 22 people on my list. So I opted for cushions with the thought that they can be used in either the bedroom or lounge room, as well as being suitable gifts for kids. Sure guys might not appreciate the decorative aspect of cushions, but they do appreciate the many ways they can use a cushion! 


I ended up sewing most of the inserts for the cushions, and have decided I really need a couple of the rectangular ones for myself! 

The hardest part was choosing fabric for everyone, but everyone seemed pretty happy with their cushions. 

For my husbands Opa and Oma (centre photo) I opted to make a little scrap section on the backs featuring fabric from their kids and grandkids cushions. The bird fabric I used for the front of their cushion will also be used in our 2nd anniversary quilt (when I get started on it). 

At least couples were a little easier as they got matching cushions. On some cushions I opted to use a feature colour as the zip, rather than just plain black or white. 

Overall it was a fun project, but rather stressful - I'm glad it is over!

Tuesday, 25 December 2012

Merry Christmas 2012

Merry Christmas! 


I hope you have a great day, filled with delicious food, family and fun! 

Meanwhile, I still have two gifts to finish making so we can leave to spend Christmas at my parents house...

Sunday, 16 December 2012

German Paper Stars

I went a little overboard recently when I found a tutorial for a really cute paper star! I was orginally looking for origami Christmas ornaments when I found some instructions on how to make these German Paper Stars. The instructions I found were far to confusing but after a little more searching I found a great YouTube tutorial. I still had to pause and go back a few times but it was easy once I worked it. 

And after cutting far too many strips of paper, I now have some new ornaments to add to my tree... 


I haven't decided what to do with the little stars yet, maybe a garland for the window - I may have to make more though and I'm not sure I'm up to it anymore! 

If you are up for a paper folding/weaving challenge you really should give these stars a try. And might I suggest you don't start making them with 6mm paper strips like I did. I really don't know what I was thinking when I cut all those strips! 

I have lots more of my crafting adventures to share with you, once I get the time. You gotta love Christmas...

Friday, 7 December 2012

Little girls peasant dresses

I am a little behind in sharing my crafty pieces lately, but my excuse is that I have been busy making Christmas presents and decorations! 

Anyway, I recently made a couple of peasant dresses using some tutorials I found which included free patterns! 

The first was for my husbands cousin whose little girl just celebrated her first birthday! I made this one using a tutorial from Scattered Thoughts of a Crafty Mom. I made the 12-18 month size, but there are other sizes available for free! 


The second was for my cousin who just had a baby girl so I made the 0-3 months size from Sew Much Ado. There is a link where you can purchase the pattern in more sizes as well. 


I actually attempted a pillowcase dress before these but messed it up and opted for the peasant dress. I have found that I am really slow at sewing... as in the first dress took me about 6 hours!!! 

This cute fabric is from Ikea in the childrens section. I had to buy it and making these little girls dresses were my excuse. I have some lovely scraps to use now. 

Anyway, if you are new to sewing these dress tutorials were great, the only trouble I had was with the sleeves since they are so little. Just give it a go and take your time - if I can do it, you can too.

Monday, 3 December 2012

Koi cross stitch coaster

I found the cutest cross stitch pattern on pinterest one day and knew I had to somehow turn it into one of my wall coasters! 


I had to add extra stitches to all sides to make it fit the coaster, but it is such a cute pattern. 

If you like this pattern you can get it (for free!) from Cross Stitch Happy

I didn't have any blue aida and attempted to colour my cloth using watered down acrylic paint. It did work, but unfortunately I watered down the paint too much and it turned out very pale. 

If you're looking for more cross stitch patterns you can also check out my pinterest board.

Tuesday, 27 November 2012

Cherry blossom cross stitch

I have finally finished my cherry blossom cross stitch!!! 


The finished size of this piece is 72cm x 24cm. I still need to make a frame for it, but that won't be until I finish my similarly sized bamboo cross stitch. And no, I have no plans to start that one anytime soon - I'll be sticking to small cross stitch pieces for now! 

I decided to share a photo of the back as I always wonder what the back of a finished cross stitch looks like. On this piece I tried to remember to keep it neat, but I still didn't pay enough attention in some places. 

I am very happy to have finally finished this piece, now if I only I could get myself to finish my other projects that have been started and promptly abandoned!

Thursday, 22 November 2012

Cotton Anniversary

It is our second wedding anniversary today (eight years together)! Cotton is the traditional gift for a second anniversary so we had a little brainstorming to do regarding something that would remind us of this day. 

We decided that together we will make a quilt for the couch. So today we did a little fabric shopping and have decided on a grand total of two fabrics to go into our quilt... 

Once we had decided what we were doing, I was worried about whether my hubby will sew everything to my standards - after this morning I am now worried that we may never buy enough fabric to actually make the quilt. Everything was too flowery and girly at the first store, then at the next store he commented that we should have bought the red flowery one we originally saw! And men complain about shopping with women... 


The two fabrics we came home with - I am hoping to add red, black and a bright blue in to this quilt so it matches everything else in our house. It looks like there will be a lot of solid colour in this quilt rather than patterned fabric. 

Hopefully I get to share the finished quilt with you sooner rather than later!

Friday, 16 November 2012

Our first room renovation!

Lately we have been very busy working on renovating the first room of our house! 

We have decided to use the medium sized bedroom as our master so we can use the big master bedroom as our 'office'. Some people think we are a bit weird for doing that, but we would both prefer more desk space for our hobbies rather than extra floor space in our bedroom - after all you are asleep most of the time you are in your bedroom! 


Getting our new bedroom to this point was a lot of work and we learnt a lot along the way! 

Our house was a rental before we bought it - it hasn't been looked after, it is getting old, and whoever did any work on this house was lazy! So you can imagine all the prep work we had to put in before we could start putting this room back together. 

And of course I completely forgot about taking a before photo!!! I must remember for the next room, which luckily is in much better condition and won't need as much work. 

I wanted to have grey walls with white trim, and while I am happy with the colour it is a lot darker than I wanted. This colour will probably be used as our feature wall colour for the rest of the house. Painting the trims took many, many coats of paint - going from mission brown to white is not fun! The next room will have a lot of sanding work on the trims before a paint brush gets anywhere near it! 

The floor was in ok condition, it just hadn't been laid properly so we pulled it all up (and stole some out of the smallest bedroom) so we could lay it all over again! 

For now, I just need to decide what colour furniture I want, figure out a new wardrobe, pick a new quilt cover, paint a picture for above our bed and think about which lamps I want to use! Oh and make a new bed for Trixie... and figure out where it would fit! 

Oh and when I go to bed I need to stop thinking about all of that and just go to sleep...

Sunday, 11 November 2012

Mounting Cross Stitch to MDF Coaster Tutorial

As promised, today I am showing you how I mounted my finished love birds cross stitch to the MDF coaster. 


I apologise in advance for my photos, I really need to get someone to take the photos for me rather than trying it myself - that or try out a video tutorial! 
What I use...

Nail file (or sandpaper) 
White paint 
Sponge brush (or paintbrush) 
Paintbrush for glue 
PVA glue 
Watered down PVA glue 
Scissors 
And most importantly your finished cross stitch piece 


1. Remove the sticker. They annoy me so I do it, but it isn't necessary. 

2. Sand down all the edges with your nail file or sandpaper. I know, it seems weird, but I always have a nail file in my pen holder as it is far more convenient for crafting. 


3. Using your sponge brush or paintbrush paint all the edges with white paint. I like to smooth the front and back where the paint pools so there are no bumps. For better coverage I do two coats. 

4. Paint the front of your coaster white. Since I used white AIDA I don't want the brown MDF background showing through the holes. 


5. I have done two coasters so you can see what the front and back look like. Allow this to dry thoroughly before moving on to the next step. 

6. Give the front a nice even coat of PVA. Remember it will soak into the AIDA and the floss a little. 


7. Carefully position your cross stitch on your coaster. Try to line up the rows with the sides of the coaster. Avoid pulling at the AIDA as it will stretch out of shape. In the case of the love birds I lined up the branch first to make sure the stitching goes right to the edge of the coaster. 

8. Once you are happy with the positioning you will need to press down on all sections of your cross stitch. Don't rub it, just keep pressing the AIDA down into the glue as it dries. Pay particular attention around your stitching as this is where the cloth lifts the most. 


9. Once your PVA has dried and your cross stitch piece is glued in place, flip it over and give the back two coats of watered down PVA. This step is optional - I use Blu-Tack to hang these on the wall and have found if it isn't sealed the Blu-Tack will pull away a little layer of the MDF each time I try to move it. 

10. Use your scissors to carefully trim the excess AIDA. I trim as close as I can, but you have to be careful not to cut into your coaster as you will ruin the painted edges. 


11. As you can see it is now nicely trimmed with no frayed edges and the glue is holding it well. 

12. This is a rather useless photo but it is an important step! You need to seal the edges so the AIDA and any cut stitches will not fray. Simply use your paintbrush to put a thick layer of PVA all around the edge - make sure you are getting both the AIDA and the coaster edge. Do two coats. 


13. Again this is another useless photo where I was trying to show that I have used the PVA on all the edges and to prevent those stitches I cut from coming loose. 

14. My piece is now ready to be added to my coaster wall

I hope this tutorial helps you get creative with your cross stitch displays. Let me know if you need any more help, or if anything doesn't make sense.

Tuesday, 6 November 2012

Love Birds Cross Stitch Pattern

I made a new cross stitch pattern to suit an mdf coaster so I can show you how I mount the completed cross stitch. 

This cross stitch features two love birds which are based off the wedding gift I made for my SIL and her husband. 

It looks quite cute on my wall and I have to say I quite enjoy these small, simple cross stitch patterns - mostly because they are quick to complete! 


As usual, you can simply right click the above image and save as or you can download the jpg through google docs

I hope you enjoy stitching up these two sweet little love birds! In the meantime, I have taken photos and will get that tutorial ready for you soon!

Thursday, 1 November 2012

Create for 365 days - September 2012

I have to say I probably won't do a 365 day challenge again. Some days it is really hard to fit in any crafting, let alone finishing a project. Add to that how forgetful I am when it comes to taking photos, writing down what I made each day and then editing and uploading photos.

I finally uploaded all the photos from September to Flickr, while I am on a roll I figured I should keep going and share my September crafts on my blog.

185: I made this cute panda button into a pendant by glueing a bail to the back. Quick and easy project!
186: German shepherd puzzle magnet - tutorial:http://krydasu.blogspot.com.au/2012/03/puzzle-magnet.html
187: More luggage tags for father's day - these were for my FIL.
188: Gerbera flower from IKEA turned into a hair clip.
189: This year everyone on my list is getting a cushion Christmas. 1 down, far too many to go!
190: Another photo wall plaque.
191: Wire wrapped pendant.
192: Another wire wrapped pendant.
193: And another wire wrapped pendant.
194: Christmas present #2!
195: This is the second tree of life I have made.
196: I wanted to see how a copper and silver wire tree of life would look, but it didn't really turn out as I hoped.
197: Luggage tags for Opa for father's day.
198: Tissue boxes turned into storage boxes with lids. The bottoms are kleenex tissue boxes and the lids are from the ALDI tissue boxes which are slightly bigger.
199: More tissue boxes with lids.
200: I covered a few boxes in contact just to make them look nicer on my shelves.
201: Photo magnet of Stellar the snake.
202: More tissue boxes with lids.
203: And even more tissue boxes with lids.
204: These are origami newspaper pots that I was trying to figure out which size paper I wanted to use.
205: The rest of the origami newspaper pots I made.
206: Another wall plaque of Lexi the peachface I handraised.
207: Red felt flower hair clip. Tutorial: http://www.craftinessisnotoptional.com/2011/11/rolled-felt-flowers.html
208: Cross stitch pattern I drew up for my MDF coaster wall plaque wall. Check out my post here: http://krydasu.blogspot.com.au/2012/10/bamboo-cross-stitch-pattern.html
209: A gift tag that didn't turn out as I hoped.
210: Christmas present #3
211: My patchwork sewing machine cover. My machine has a hard case so I made the cover to go over that as dust still settles on my machine at the handle hole.
212: Photo wall plaque of one of my succulents.
213: My finished bamboo cross stitch wall coaster. Free pattern uploaded here: http://krydasu.blogspot.com.au/2012/10/bamboo-cross-stitch-pattern.html
214: Another wall coaster photo of the sunset over the pine forest.

Thursday, 25 October 2012

Bamboo Cross Stitch Pattern

As promised last week I am sharing my bamboo cross stitch pattern today. 


I sized this pattern specifically for the MDF coaster I wanted to mount it on so you may need to extend the bamboo stitching a little. 

If you are interested I used the Boyle MDF coasters which I buy from Bunnings. 


I have posted it as a jpg so you can just right click and save as or download through google docs

Have fun stitching!

Sunday, 21 October 2012

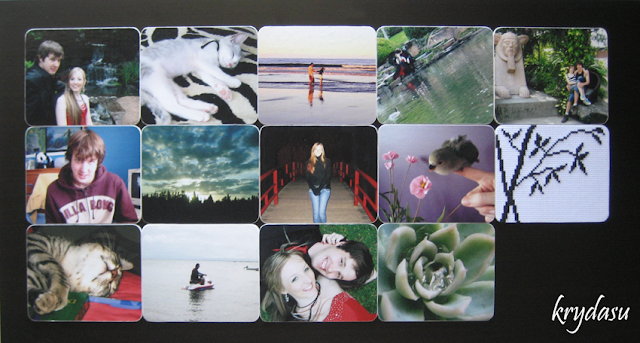
Coaster photo wall

Back in April I had what I hoped would be a brilliant idea and started working on this never ending project... 

The idea was to use little MDF coasters I found at Bunnings to create a photo wall! Obviously this project will take a long time but the idea is that once I have a wall full of them I can just change around or switch out old for new. At 69c each it is a cheap project and being MDF I can just Blu-Tack it to the wall without the worry of hearing photo frames crashing to the floor! 


As you can see it looks great when they are all laid out together - all I need to do is pick which wall I want to use and then decide what colour to paint the wall! 

I ended up getting the idea to add a cross stitched coaster to my wall, and luckily it seems to have worked the way I saw it in my head. I'll share that bamboo pattern with you in my next blog post. It is a little fiddly mounting it onto the MDF coaster but so far it is holding well - I'll get started on another cross stitch piece so I can share with you how I mounted it. The only thing I am worried about is whether the glue will cause the aida to yellow over time. 

I hope this gives you new ideas for displaying your favourite photos (or artwork)!

Tuesday, 16 October 2012

Patchwork sewing machine cover

I had quite a few scraps leftover from making cushion covers, and as small as they were I could not part with them! So I decided to have a go at patchwork and at the same time make a cover for my sewing machine (well, a cover for my sewing machine case which is boring and white). 

After all the time I spent cutting and sewing those little pieces of fabric together I was quite hesitant to cut out my pattern pieces and sew them for fear of making a mistake. 


As you can see I worked up the courage and I am quite happy with it. I chose to try out bias binding for the bottom but I definitely need more practise with that! The only thing I would change would be to use heavy interfacing. I bought a packet of medium interfacing which seems to be lighter than my other light/medium interfacing and it just isn't as stiff as I was hoping. 

Other than that, patchwork was great for practising cutting with my new Olfa rotary cutter and sewing heaps of straight lines!

Friday, 12 October 2012

Spring Flowers 2012

Even though it is freezing and windy in QLD today, the flowers are reminder that it is indeed spring! 

I thought I would share some photos of the beautiful flowers that have opened up and added some colour to my garden. 


I can't wait to pick the tomatoes off this beefsteak tomato plant, I also have a roma tomato plant that is still going strong since last year! 


I have no idea what this little shrub is, but I noticed it has these cute little flowers on them - I keep meaning to try and ID it. 


My cat mint looks great covered in purple flowers - this is the first time I have planted it in the garden and it looks far better than my previous attempts at growing it in a pot! 


Strawberry flowers - the best flowers since they are followed by delicious strawberries. 


A yellow calendula which has finally settled into the garden. 


This is an aloe vera flower spike - in front of the huge ponytail palm. Now that my front garden is looking good I have started on this mess of a garden bed - don't plant horrible vines in your garden that have huge seed pods! 


Some of my succulents are flowering and making a big mess. 


This bottlebrush is attracting rainbow lorikeets and little finches. 


My geisha girl is happily flowering and seems quite happy to be in the ground and out of its pot. 


I have recently moved my jasmine from a pot to the front yard. It must have settled in already as it has started flowering. 


I'm not positive but I think this plant is a jade which has these pretty little flower spikes. Unfortunately these form tiny succulent leaves which break off in the wind and start growing wherever they land. 


And I have saved the best for last - my beautiful hippeastrums. I recently divided up all the bulbs I had from my multiple pots so I could plant some into my front garden. This is my biggest bulb and I was quite surprised at how quickly it sent up a flower spike. It currently has four open flowers and another two buds waiting to open - last year it had a total of five flowers. At this stage none of my other bulbs have sent up a flower spike. 

I hope you are enjoying all the beautiful spring flowers!

Wednesday, 3 October 2012

Create for 365 days - August 2012

Well I have been a bit slack with photographing, editing and uploading the crafts I have been making! I've finished uploading the photos from August, however they aren't very interesting since I mostly did origami while we were away.

154: Blue rope dog toy. This is the tutorial I used to learn the 'braiding' - http://www.yellowdandy.com/2011/03/diy-dog-chewtug-toy.html
155: Stamped gift tags.
156: Another wall plaque.
157: Ladybug magnets.
158: Glass stone magnets. I used this tutorial - http://www.makoodle.com/diy-glass-magnets-easy-teacher-gift/
159: More origami balls.
160: Pendant made from a coconut shell elephant button.
161: Finally filled my origami ball vase!
162: Stamped bookmarks which I then coloured with gel ink pens.
164: Light purple loop hair clip - angled cut. Tutorial - http://www.craftinessisnotoptional.com/2011/11/rolled-felt-flowers.html
165: Origami cubes now that my origami ball jar is full!
167: Attempted a wire wrap pendant of a Matroyshka bead.
168: Lino cut shell stamp.
169: Butterfly cabochon pendant.
170: Created a lino cut love stamp... but then I lost my stamp!
171: Modified a cross stitch pattern from my "Two-hour cross stitch" book by Patrice Boerens.
173: My first attempt at a luggage tag - I am making these for father's day gifts.
174: Three more origami cubes.
175: Five more origami cubes.
176: My red cross stitch tree magnet.
177: Four origami cubes.
178: Three origami cubes.
179: Graphic of my love logo since I lost the stamp I carved.
180: More origami cubes.
181: And even more origami cubes.
182: Blue tree cross stitch magnet.
183: Used hot glue to keep my peg basket in place.
184: The luggage tags I made for my dad for father's day.

Unfortunately my Flickr account is getting close to the limit for a free account so I will be deleting a few of the photos - mostly repeats of projects like my origami cubes and balls.

Thursday, 27 September 2012

Glitter gift tags!

I found photos I had taken for a tutorial quite awhile ago and had forgotten to post it! 

You may have noticed in my Flickr photos that I have made quite a few glitter gift tags and cards. They are really quite easy to do so I thought I would share how I do it. 


Materials:

A stencil (or you can freehand your image)
A skewer and/or toothpicks
Glitter
PVA glue
Blank card


1. Gather your supplies!
2. I chose to use a shell stencil for this gift tag so just line it up where you want the picture to be - think ahead of where you will be writing.
3. Because we are using glitter we don't want to see pen or pencil marks where we outline our image. Use your skewer just like a pen and create an indented outline in the card.
4. As you can see it is a little difficult to see the outlines but it looks much better when finished.
5. Using a skewer or toothpick start filling one section of your image with pva.
6. Once it starts to dry around the edges you will need to glitter that section and move onto the next.
7. You can carefully complete sections next to already glittered parts - it is better if you can do each section in one go.
8. Once you are finished leave the pile of glitter on top until you are sure it is dry.
9. Tap off the excess glitter and your glittered tag is ready!

Unfortunately my husband put something on top of mine while it was drying. All I was worried about was the cat jumping on it - I know better now. 

Go ahead and make your own cute gift tags using glitter!

Thursday, 20 September 2012

Cross stitching in the car

Before we left for Canberra I was trying to think of a couple of crafts I could do in the car. I chose to take along my 2 inch paper squares to make origami cubes and I chose to take along some cross stitch. 

I did take my large cherry blossom cross stitch just in case, but as I thought, I didn't end up doing any of it - it is just too big to do in the car. 

Instead before we left I decided I would make a couple of cross stitch magnet kits. I opted to create my own pattern based around a tree from my "Two-hour cross stitch" book by Patrice Boerens. I could have simply used her pattern but I wanted to make the most of the space available on the magnet. 


As you can see it is still quite similar but mine is taller and not quite as wide. Because this isn't my own original pattern, I won't be sharing it with you. It does show that you can easily make an existing pattern work for your needs with a little alteration! 


I had two magnets left so I chose to do a red one for Ray and a blue one for me!

Saturday, 15 September 2012

Simple fix for a slipping peg basket

I know this isn't very interesting, but in my defence I was so excited to finally figure out how to keep my peg basket in place on the laundry trolley! 

You're probably thinking, why not just buy a different peg basket? The answer to that is I love this peg basket, and threw the others away. I like my pegs being lined up, facing the same way and this rectangular basket is perfect for my slightly OCD requirements - go ahead, everyone laughs when they see my peg basket! 


Originally I used zip ties to hold my peg basket in place - but it didn't stop the basket sliding down the sides, plus when you cut the ends off it is quite sharp. 


My new solution, that has been great so far is simple hot glue. It stops the basket sliding from side to side and I can easily take the basket off when I need to. 

My laundry trolley stays in the shade so using my hot glue gun won't be an issue, but if leave yours outside you should use something like silicon. Saying that though, your plastic pegs will last longer if they are kept in the shade. 

If you have a peg basket that won't stay put, try this out - it certainly saves you having to pick up all your pegs (and then lining them up again)!

Monday, 10 September 2012

Sewing machine storage for feet

As you might remember I got a new sewing machine for my birthday - a Janome 3160 QDC. The accessory storage for this machine can be pulled open without removing it, which is great because it came with a lot of feet! Unfortunately it got rather annoying digging through looking for the right one, and it will only get worse as I buy more feet. 


Originally I made a pouch for all my sewing machine supplies, which had plenty of room but still had the issue of needing to dig around to find what I wanted. 

In the end I chose to make a cardboard insert to sit on top and create a second level for the feet. 


Now I have my most commonly used feet in the top section and can see at a glance which one I want! 

Measuring this was a bit of a pain but since I used cardboard I could trim it where required. As I get more feet I might create dedicated compartments for each foot - since most are small I can always create more levels in each section. 

If your sewing machine has accessory storage like this you may find it very convenient to create your own insert.

Wednesday, 5 September 2012

July 2012 - Create for 365 Days

My summary for July 2012...


You can check out all of my photos here at Flickr.

123: Gold wire wrapped shell disc pendant.
124: Tulip cross stitch magnet.
125: Tulip cross stitch pattern.
126: Inifinity scarf from a thin stretch fabric - I just sewed the ends together since it won't fray.
127: More framed blobby drawings.
128: Yellow rope dog toy for Trixie - kind of followed this tutorial: http://www.yellowdandy.com/2011/03/diy-dog-chewtug-toy.html
129: A new black and white floral type cushion cover.
130: Another cushion cover with blue polka dots.
131: Another origami multiplex ball.
132: More origami multiplex balls.
133: A little zippered pouch - I used a zip from an old t-shirt.
134: More origami multiplex balls.
135: More origami multiplex balls.
136: More origami multiplex balls.
137: More framed blobby drawings.
138: Repaired the rip in my paper parasol - see this post where I explained how I did it.
139: Fabric tissue case - I used this tutorial: verypurpleperson.com/2010/02/tissue-case-tutorial.html.
140: Blobby drawing based around a scotty dog - posted about here.
141: Red, black, white and grey striped cushion cover.
142: RC helicopter foam bag insert for my husband.
143: Another fabric tissue case - I used this tutorial: verypurpleperson.com/2010/02/tissue-case-tutorial.html.
144: More origami multiplex balls.
145: Origami cubes - similar to the multiplex balls.
146: Another fabric tissue case - this time I used this tutorial so that all the edges were inside: http://coco-stitch.blogspot.com.au/2011/11/reversible-pocket-tissue-case-tutorial.html
147: Black and silver stamped swirl gift tag.
148: Wall plaque of me at the Japanese Gardens.
149: Black and silver swirl stamped gift tag.
150: Black and gold swirl stamped gift tag.
151: More origami multiplex balls.
152: This is a copy of a beaded headband I had as a teenager. The original had elastic connecting the bottoms but I cut it off and pinned it into my hair.
153: Bamboo stamped gift tag.

Friday, 31 August 2012

Canberra Holiday Photos

I wanted to share a few of the photos I took on our trip to Canberra now that we are home. I used my phone to take photos so they aren't great but it certainly makes sharing them easier! 

First up we went to the Australian Reptile Park, which doesn't just have reptiles... 

Look at the turtles eyeing the Sail-Fin Lizards tail 


This is the Australian Institute of Sport where you can take a tour... 


The Australian National Botanic Gardens... 


One of the many beautiful trees flowering this time of year... 


This place was great, most of the snakes and lizards were active while I was there, the man working there was really nice and very knowledgeable. If you ever visit Canberra I strongly recommend you visit them. 


The Australian War Memorial... 


Taronga Zoo... 


I love visiting new zoos so I was pretty lucky to visit three of them this trip. My husband was working so unfortunately we didn't have the time to visit the Canberra Zoo. I do have some more crafty things to show you soon - I need to finish unpacking and get all of our clothes washed first!